Buckets, Scopes and Collections
In this section, you’ll learn how to logically partition your data in Couchbase using buckets, scopes and collections.
So What is a Bucket Exactly?
If you think in database terms, a Couchbase Bucket is analogous to a database: it’s the data store where you’re going to store and retrieve related information about the students.
You can click on the link to access the Buckets page, then click on Add Bucket.
In this dialog, enter student-bucket in the Name box.
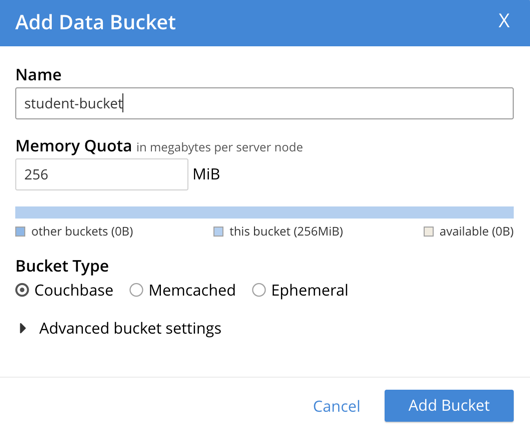
Once you have entered the bucket name, press the Add Bucket button to return to the main bucket list.
Scopes and Collections
In all but the simplest cases, it’s better to provide some kind of separation between documents of different types. Couchbase has a simple hierarchy model which allows for such separation:
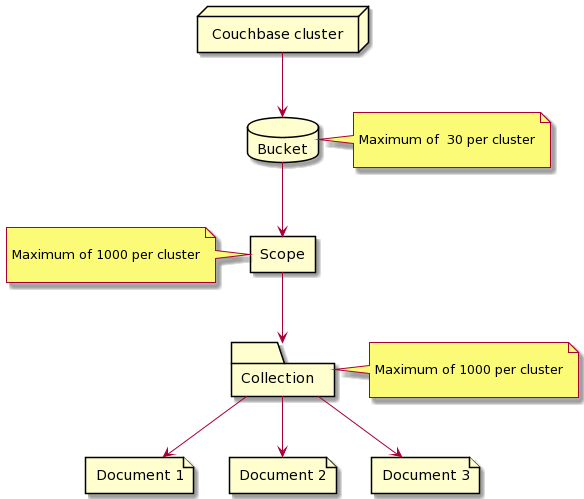
You’re already familiar with clusters, nodes and buckets.
Inside a bucket you can also have any number of scopes, and inside a scope you can have any number of collections.
| scopes |
acts as a parent to a collection.
When you create a new bucket, Couchbase will provide you with a default scope called |
| collections |
a collection can contain a set of documents. A default collection ( |
Rather than have our student records stored in the default collection, we’re going to add two collections: one will be used to store the student records, the other will be used to store the course details.
Now looking again at the relational design of our student database:
We can see that our equivalent document-based system could do with a little decomposition:
So, inside our student-bucket we’ve set up a scope called art-school-scope.
Perhaps we have a number of schools and we want to restrict access to the school based on the role of the user; using scopes is the ideal way to do it.
Within the scope we set up two collections:
| student-record-collection |
contains the student records, and within each student record we carry a list of all their enrollments. Again, this moves away from the standard relational decomposition since we’re actually storing the enrollments as part of the student’s record, instead of implementing it as a link table between the students and the courses. |
| course-record-collection |
The enrollment records will carry a link to the course record it applies to, so we can retrieve other details such as the full name of the course and the number of credit points the student receives for completing it. |
| Of course, it’s possible to just add the details of the course to the student’s enrollment records, but this may have downsides. Changing the credit points on the course, for example, would involve running through every student’s enrollments and changing the credit details on each one. This is why the document model and relational model are used in conjunction to get the best combination of robust design and performance. |
Now that you understand the basics of scopes and collections, return to your admininstration screen so we can add them to your bucket.
Adding the Student Scope
Return to the Buckets screen and click the Scopes & Collections link.
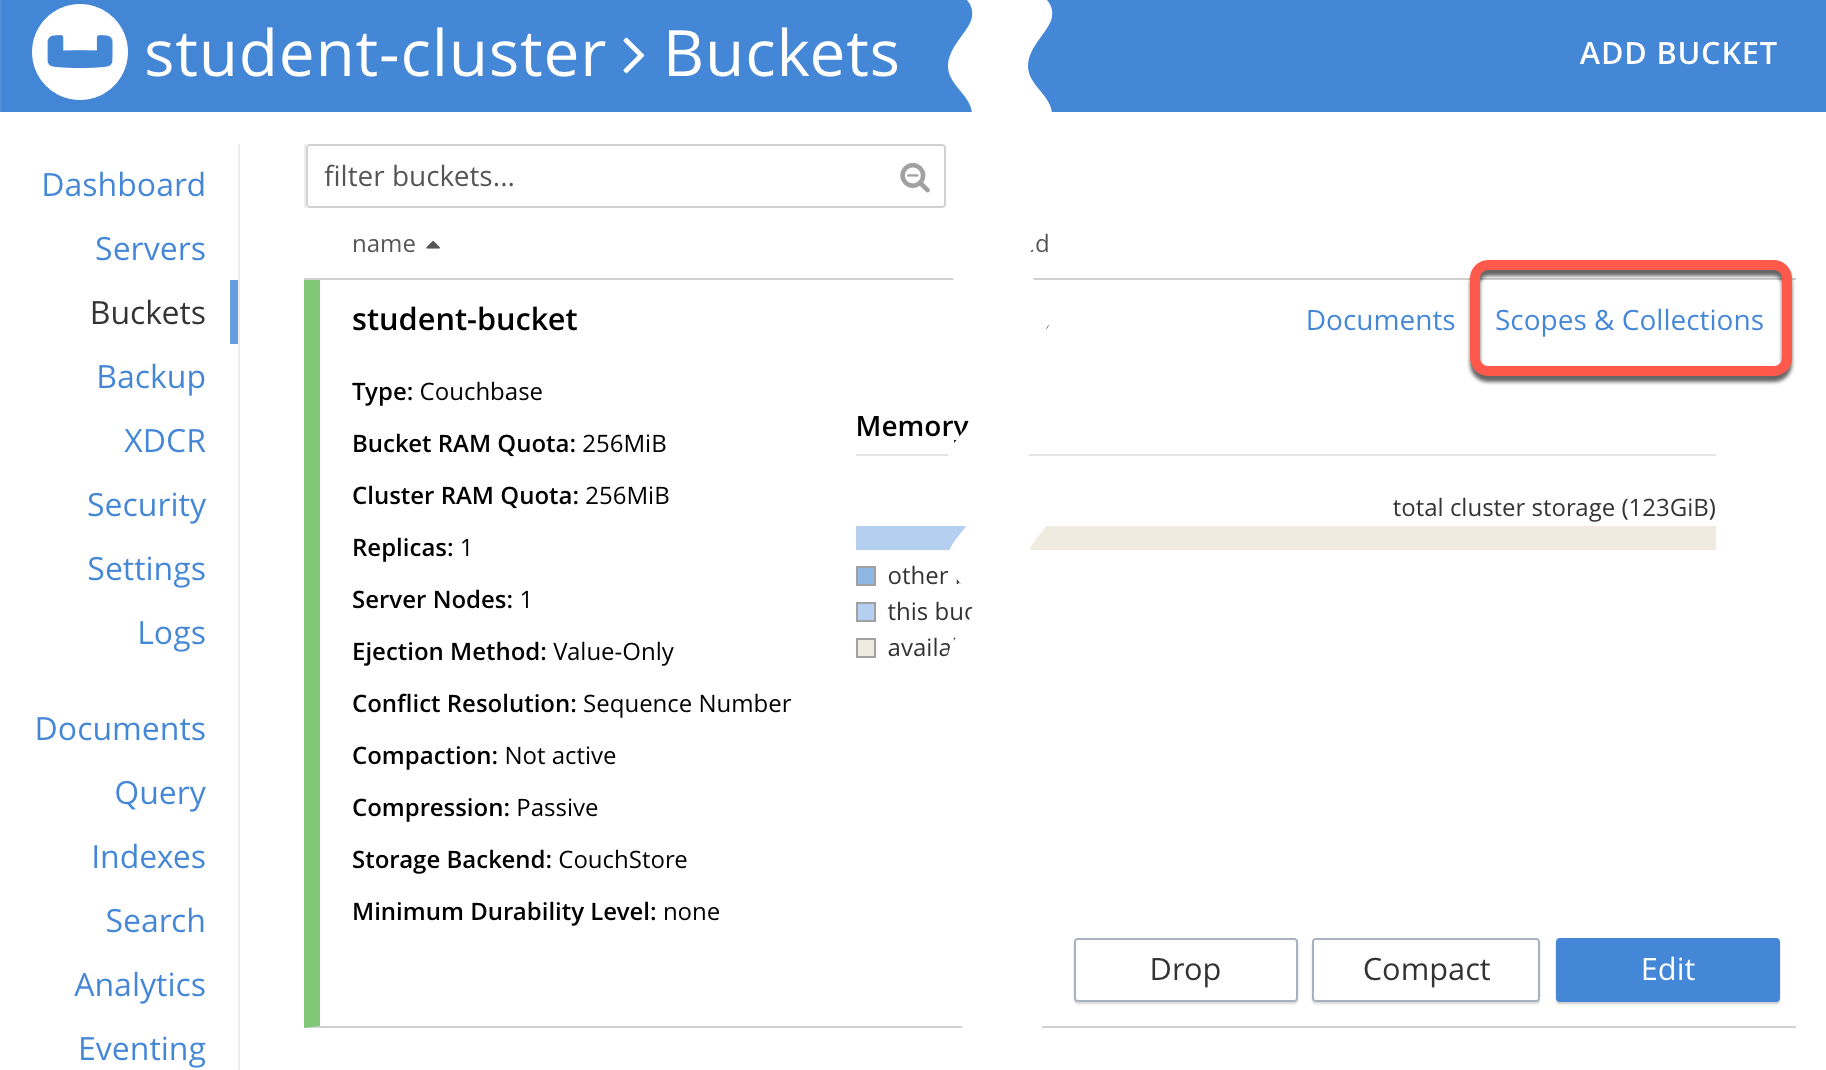
Although the bucket is created with a default scope, for this example, you’re going to create your own. Click on the Add Scope link.
On the next dialog, create your art-school-scope.
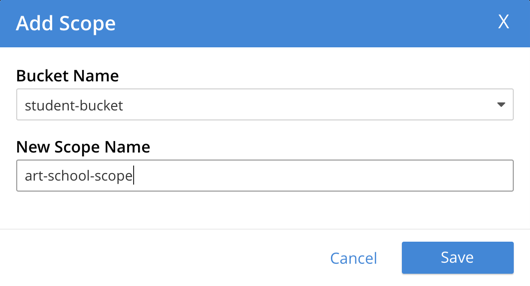
Press Save to save the new scope and return to the bucket screen. The new scope should be showing in the list.
Adding the collections
Next, we’re going to add two collections for the new scope. Click the Add Collection link for the `art-school-scope'.
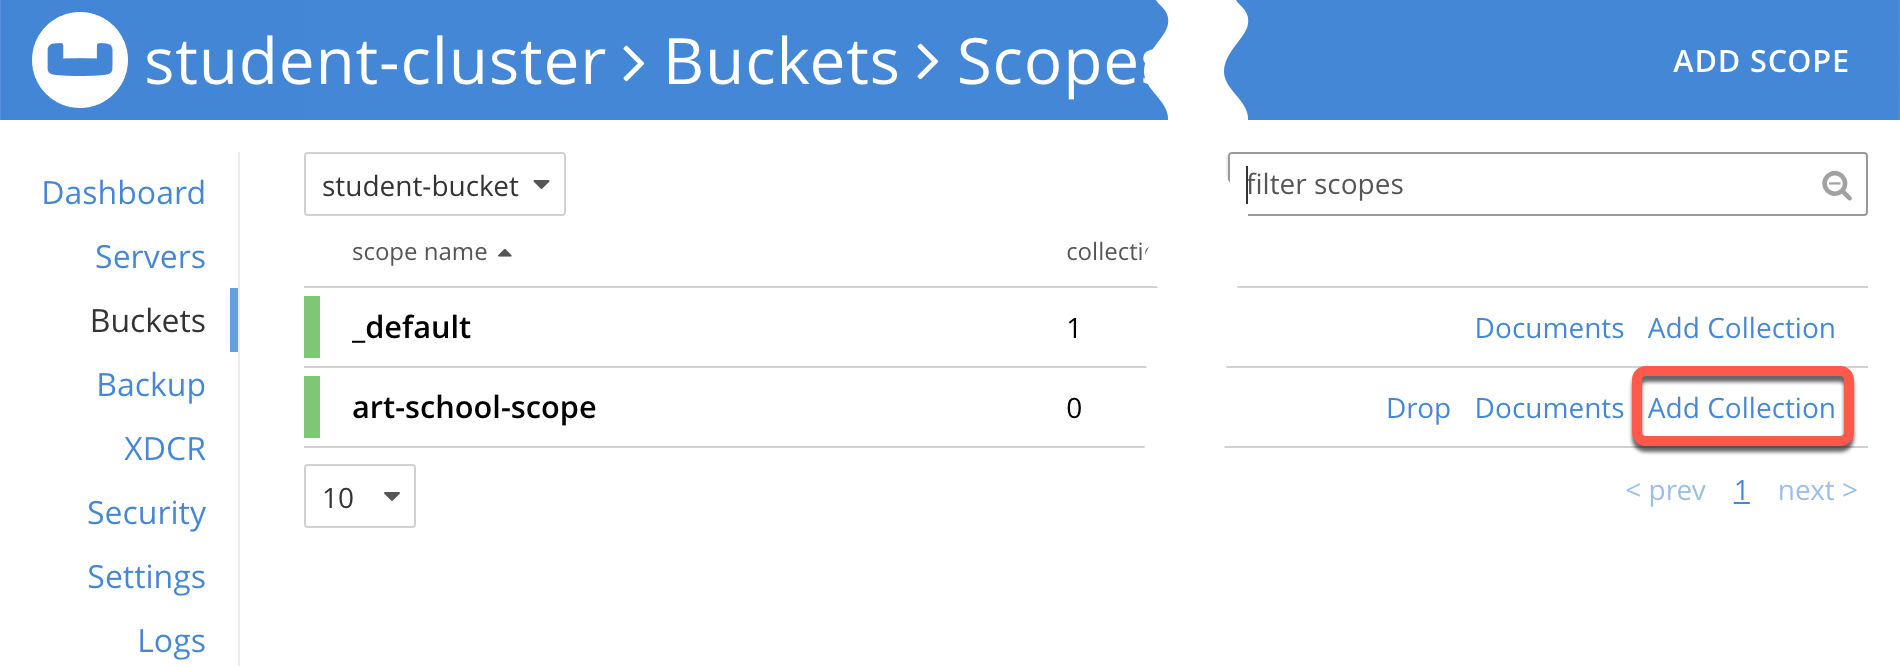
When the collection dialog is displayed, fill in the name of the first collection: student-record-collection; then
press Save.
Now do the same again to create the course-record-collection.
You should now have the art-school-scope containing your two collections.
